
This onboarding tutorial provides an overview of all the basics of the system. In the following you will learn how the navigation works, how to get access to the database and how to retrieve certain information.
This onboarding tutorial will give you an overview of the basic functionalies that will help you get started:- Login
- Main navigation
- Search & filters
- Entry creation
- Action bar
- Navigating dialogs
- Auto-Save
- Data Reports
- Contact Support
Login
To log in you need your e-mail address and password. If you have forgotten your password, then you can easily reset your password by clicking on the corresponding button.
Main Navigation
In the main menu there are different tabs that lead you to the respective subsections.
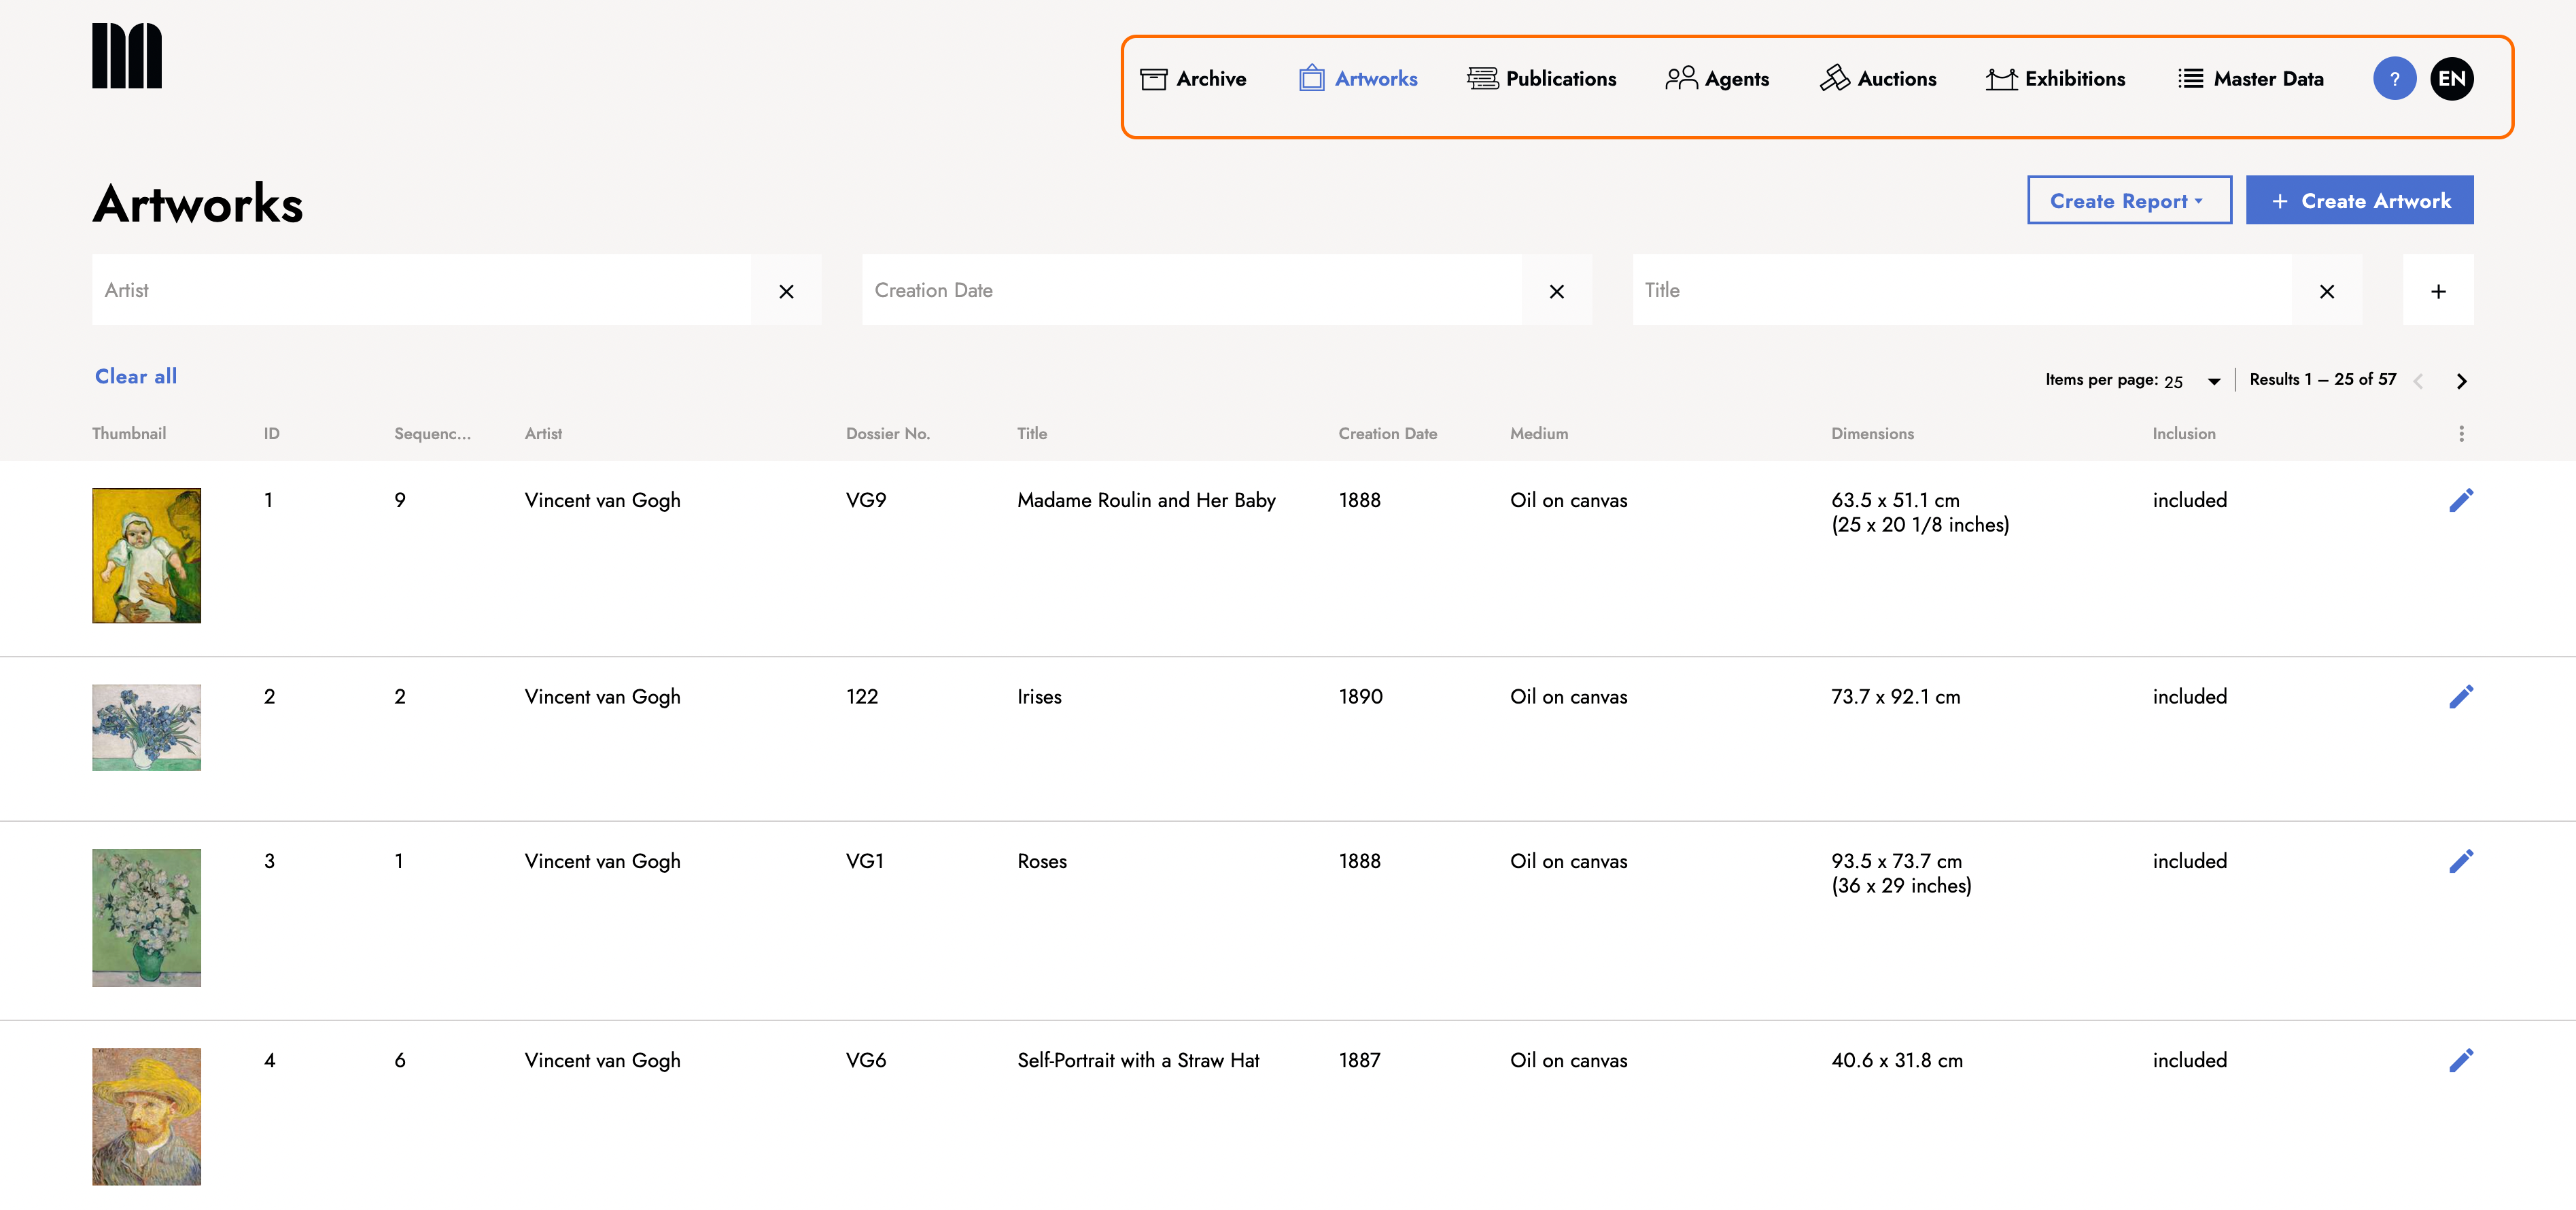
- The Archive section contains data in structured (e.g. meta-data) and unstructured forms (e.g. text). In this section, data, including images and other files, can be uploaded and managed.
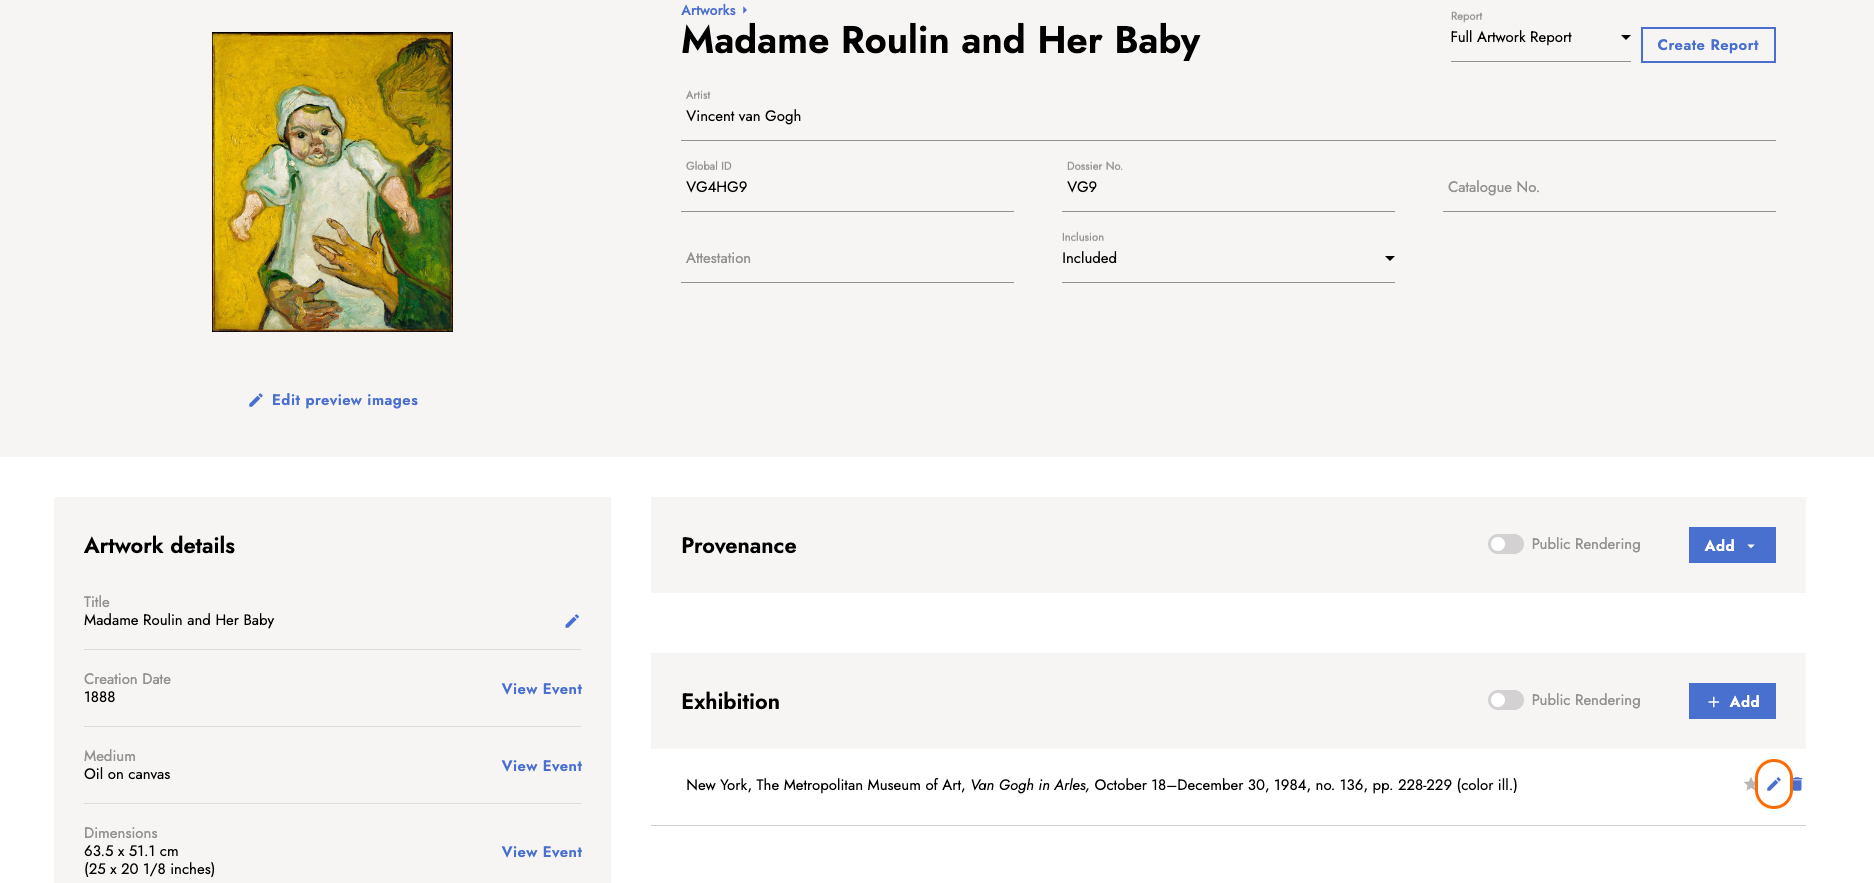
- In the Artwork section you will find all entries for your artworks, including all information stored in the database. The individual artworks can be linked to categories such as publications, exhibitions or auctions.
- Under the tab Publications you will find all the publications that have been uploaded to the system. New publications can be added here and existing ones can be linked to artworks. In addition, hierarchical structures, e.g. for multi-volume series, can be created.
- In the Agents section, all persons or institutions are recorded. These can also be linked to data of the other sections.
- In the Auction and Exhibition tabs, corresponding entries can be made. These entries can also be linked to other entries, e.g. catalogs and artworks.
- In the Master Data tab, additional entities are managed like indexing terms, committee dates and elements of the public display.
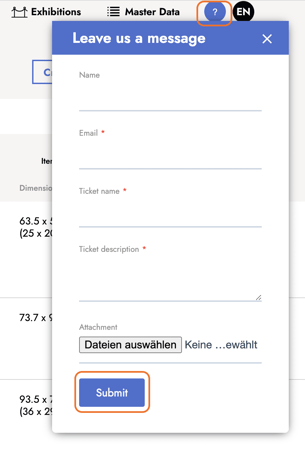
- On the very right side of the main menu bar you will find a Help button. By clicking on the question mark icon you can create a support ticket if you have questions or problems.
- To the right you will find the User Initial, which you can click to log out.
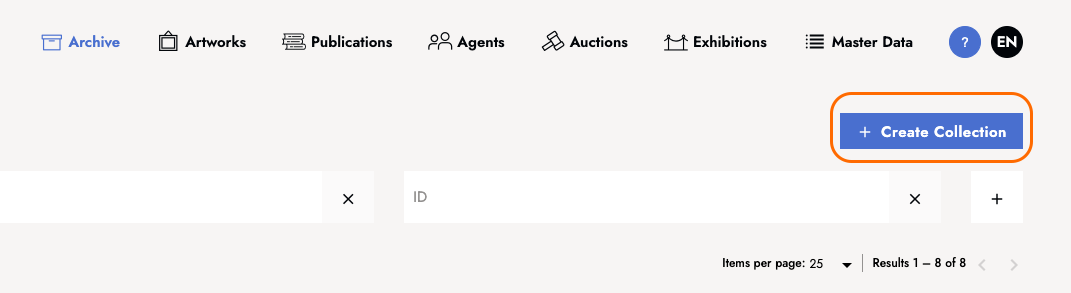
Search & Filters
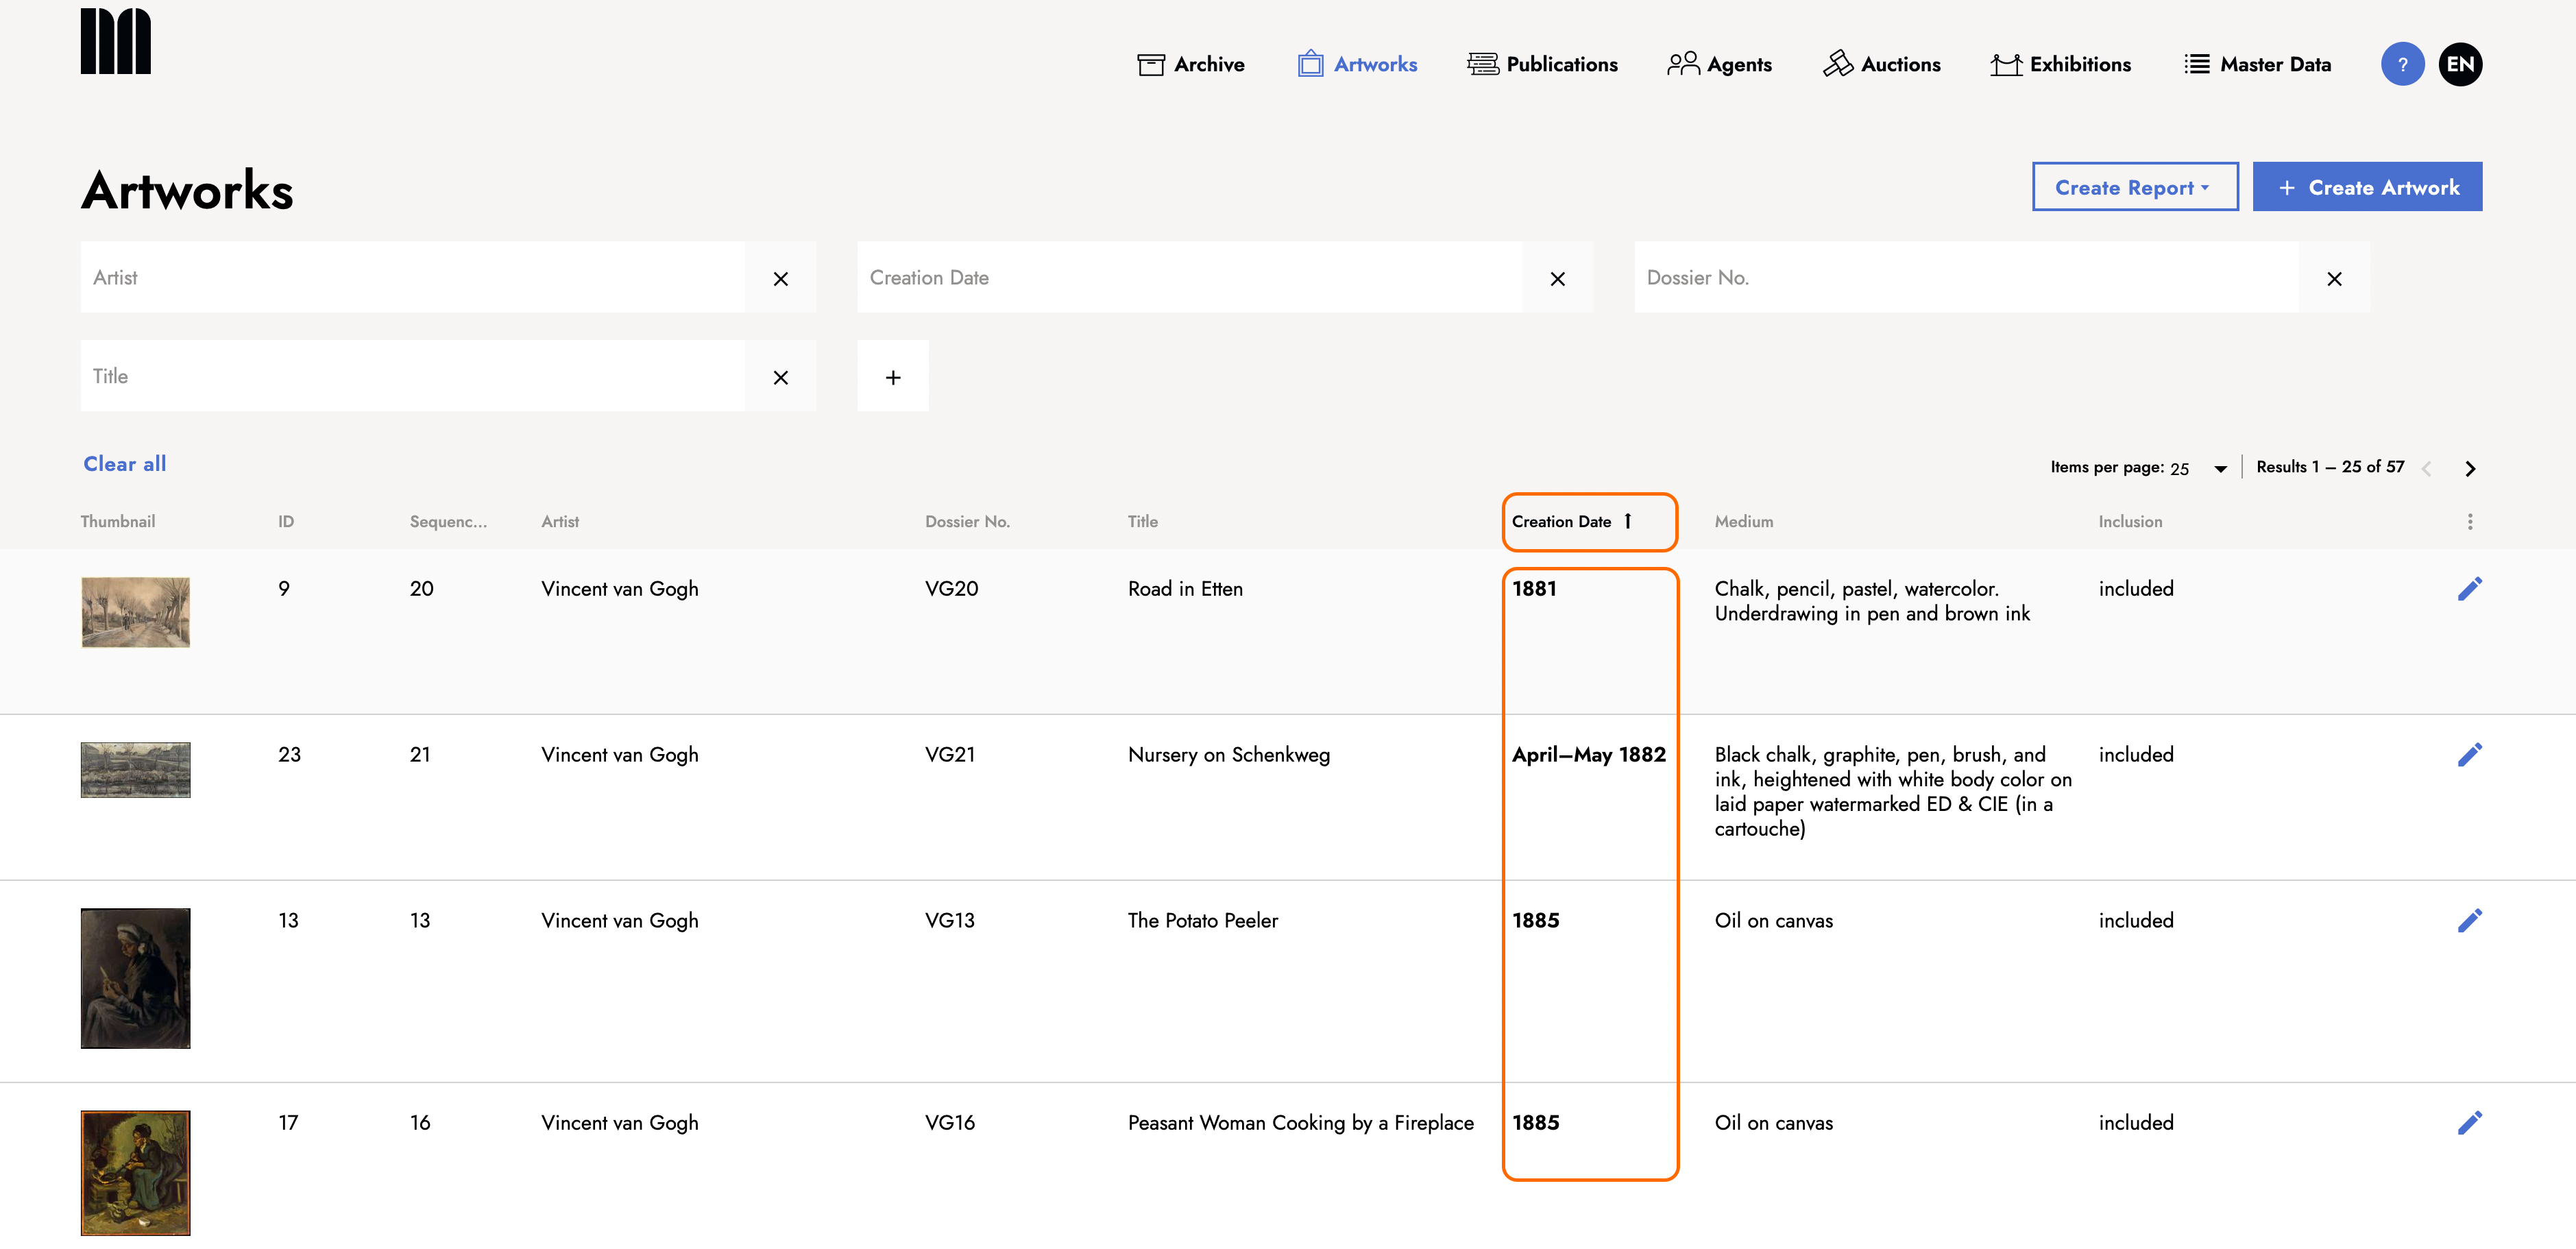
For all the sections in the main menu you will find a list view of all the entries. Above the list of results you can find the search filters. Additional search filters can be added via the + symbol right next to the given filters.

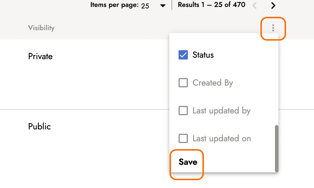
The information displayed in the list view can be customized by selecting categories from the drop down menu that opens once you click on the icon with the three dots. Your selection from the drop down menu has to be confirmed by clicking on Save.
In addition, the displayed entries can be sorted by clicking on the respective heading.
In this tutorial the use of the search filters is explained in more detail.
Entry creation
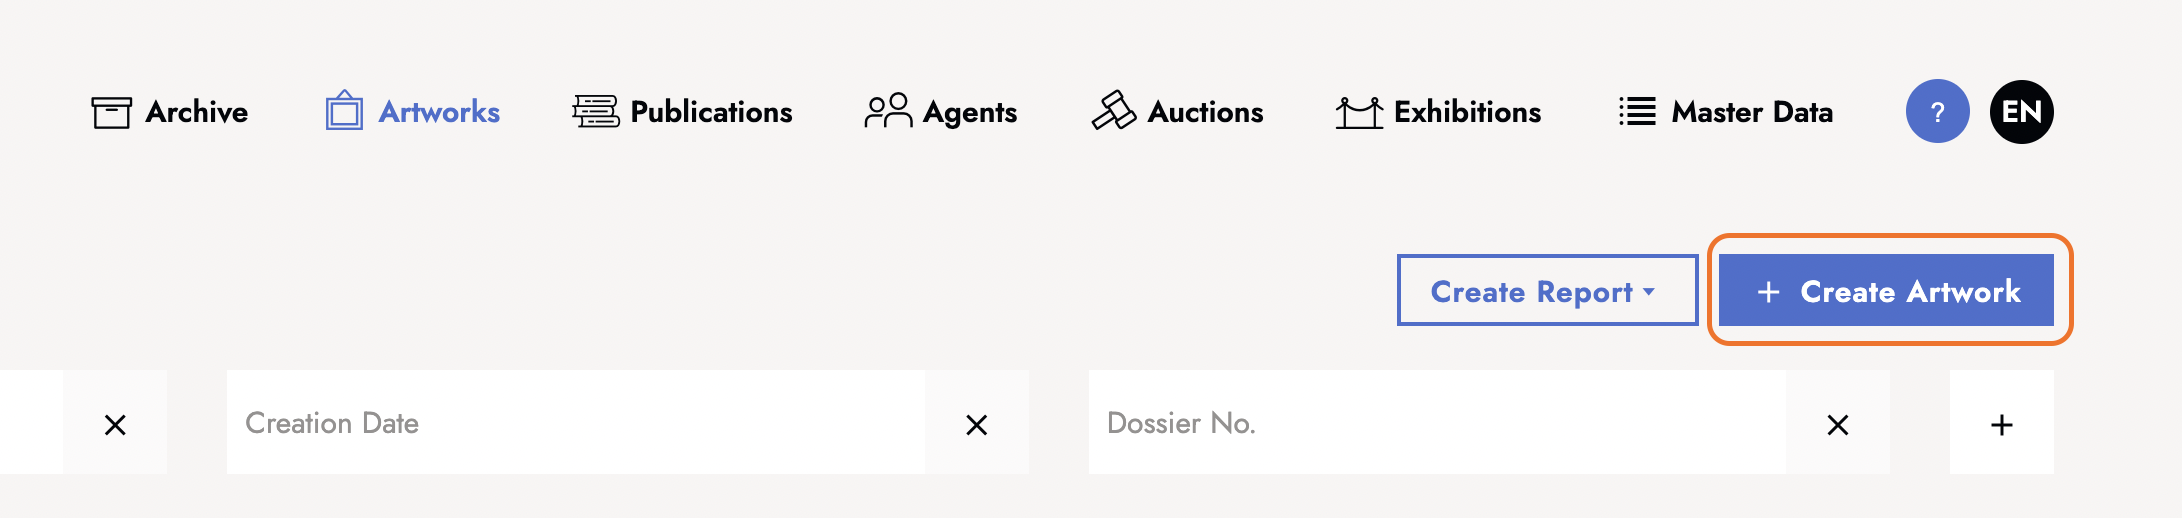
A new entry is created by clicking on the + Create field in the top right corner. After creating the entry, all existing metadata can be added.
You can find more information about creating an artwork or a collection in separate tutorials. Individual resources can be created separately at different levels and later linked to the entry.
Action Bar
The Action Bar is always visible at the bottom of an entry.
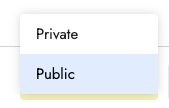
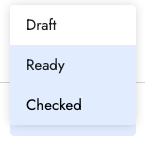
In the Action Bar you can set the visibility as Private or Public and the editing status as Draft, Done or Checked.
On the right side of the editing status there is a button to publish the entry. Further to the right, an entry can be marked as duplicate or master or moved to the archive via the symbol with the three dots.
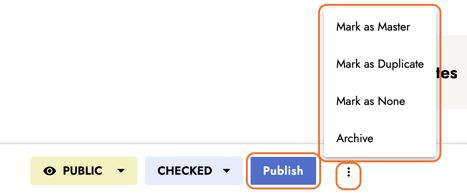
On the far right of the action bar there is a button to close the bar.
Navigating Dialogs
Art events, e.g. exhibitions, auctions etc. can be created and linked to existing artwork entries. This also works with agents like dealers, museums, institutions or publications. An exhibition can be edited by clicking on the pencil icon located on the right side of the exhibition column.
This opens a new dialog window where information can be entered. The dialog can be closed by clicking on the Close button on the lower right corner.
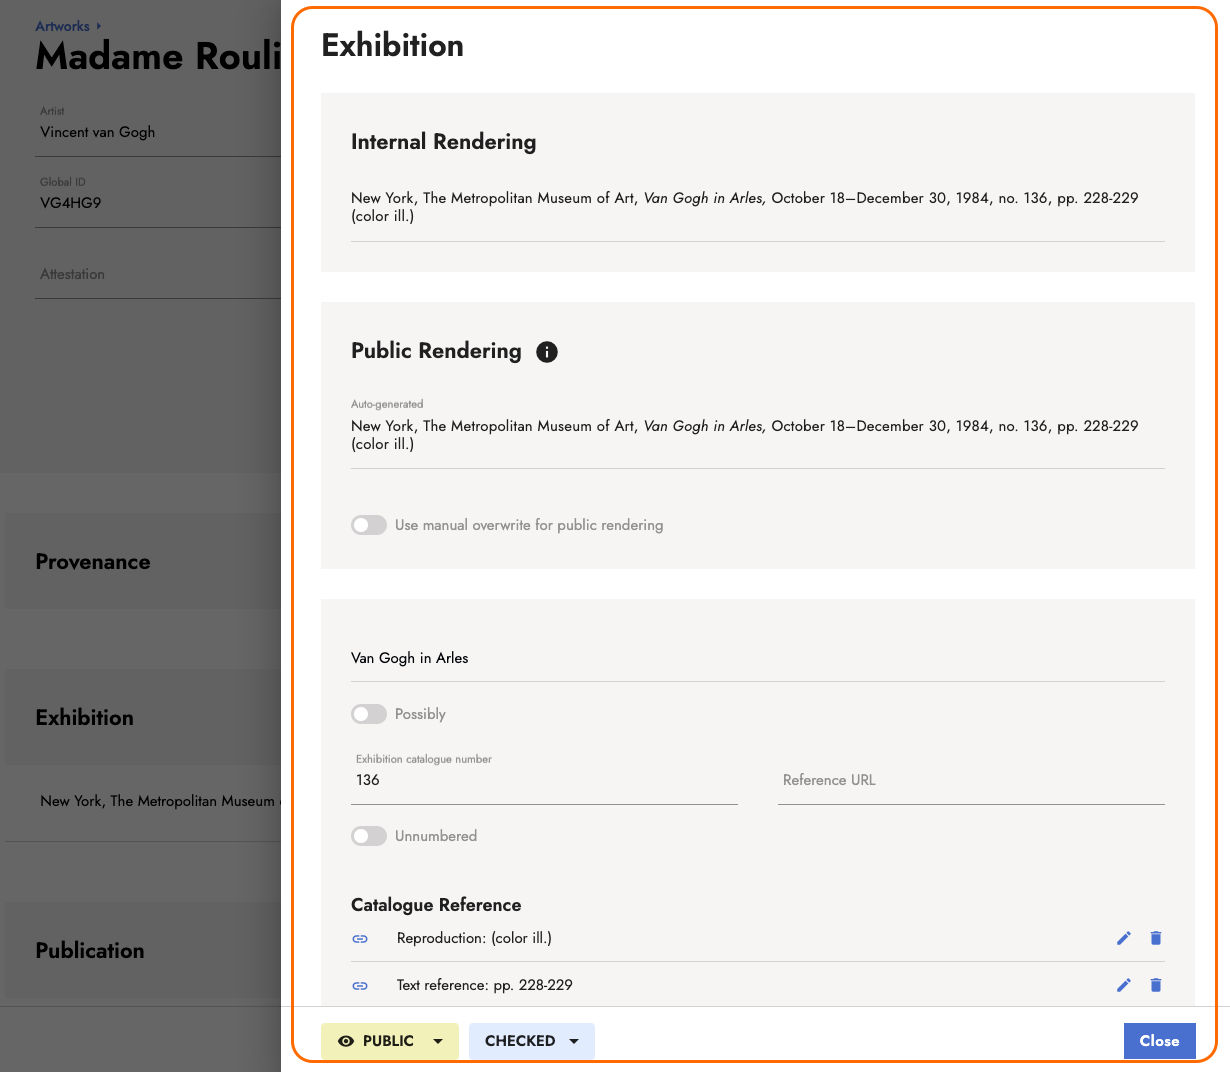
More detailed information can then be added by clicking on the title of the exhibition within the dialog window.
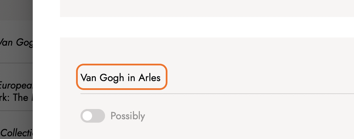
This will open a new tab wich leads you to the entry of the exhibition. There, you can create related Venues and Agents by clicking on the + Add button or you can edit existing information by clicking on the pencil icon.

Auto-Save
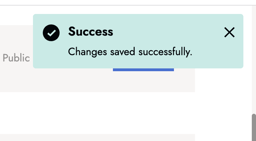
There is an automatic saving function for all entered metadata. Information removed from the entry fields is automatically deleted. Newly entered information is saved without having to save it manually. Successfully made changes are confirmed by a box popping up in the upper right corner.
Data Reports
Reports can be created for the artwork entries at any time and thereby the existing data can be exported. There are two ways to create reports.
1. An artwork Report can be created by clicking on the button Create Report in the upper right corner of the artwork entry.
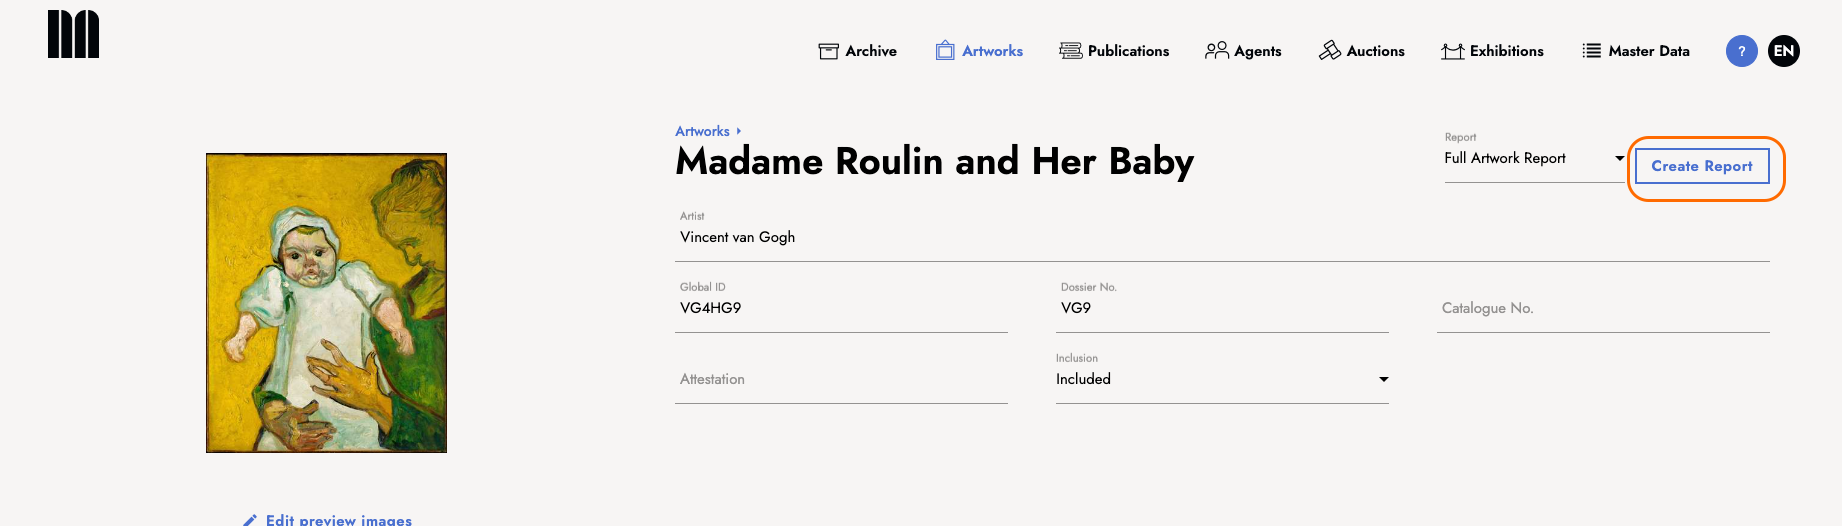
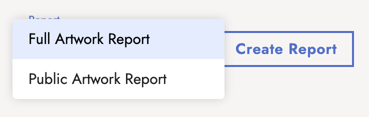
To the left of the button, you can choose between a full report and one that contains only published data.
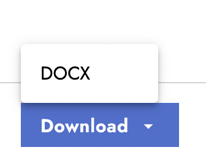
By clicking the Create Report button a preview will be opened in a new tab. You can now download the information shown by clicking on the download button and choosing the format.
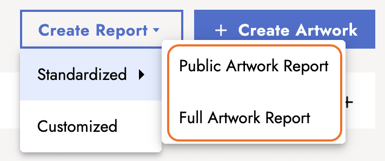
2. In the overview of the artwork section, the Create Report button is located in the upper right corner. Via this button, a standard or personalized report can be selected via a drop-down menu.
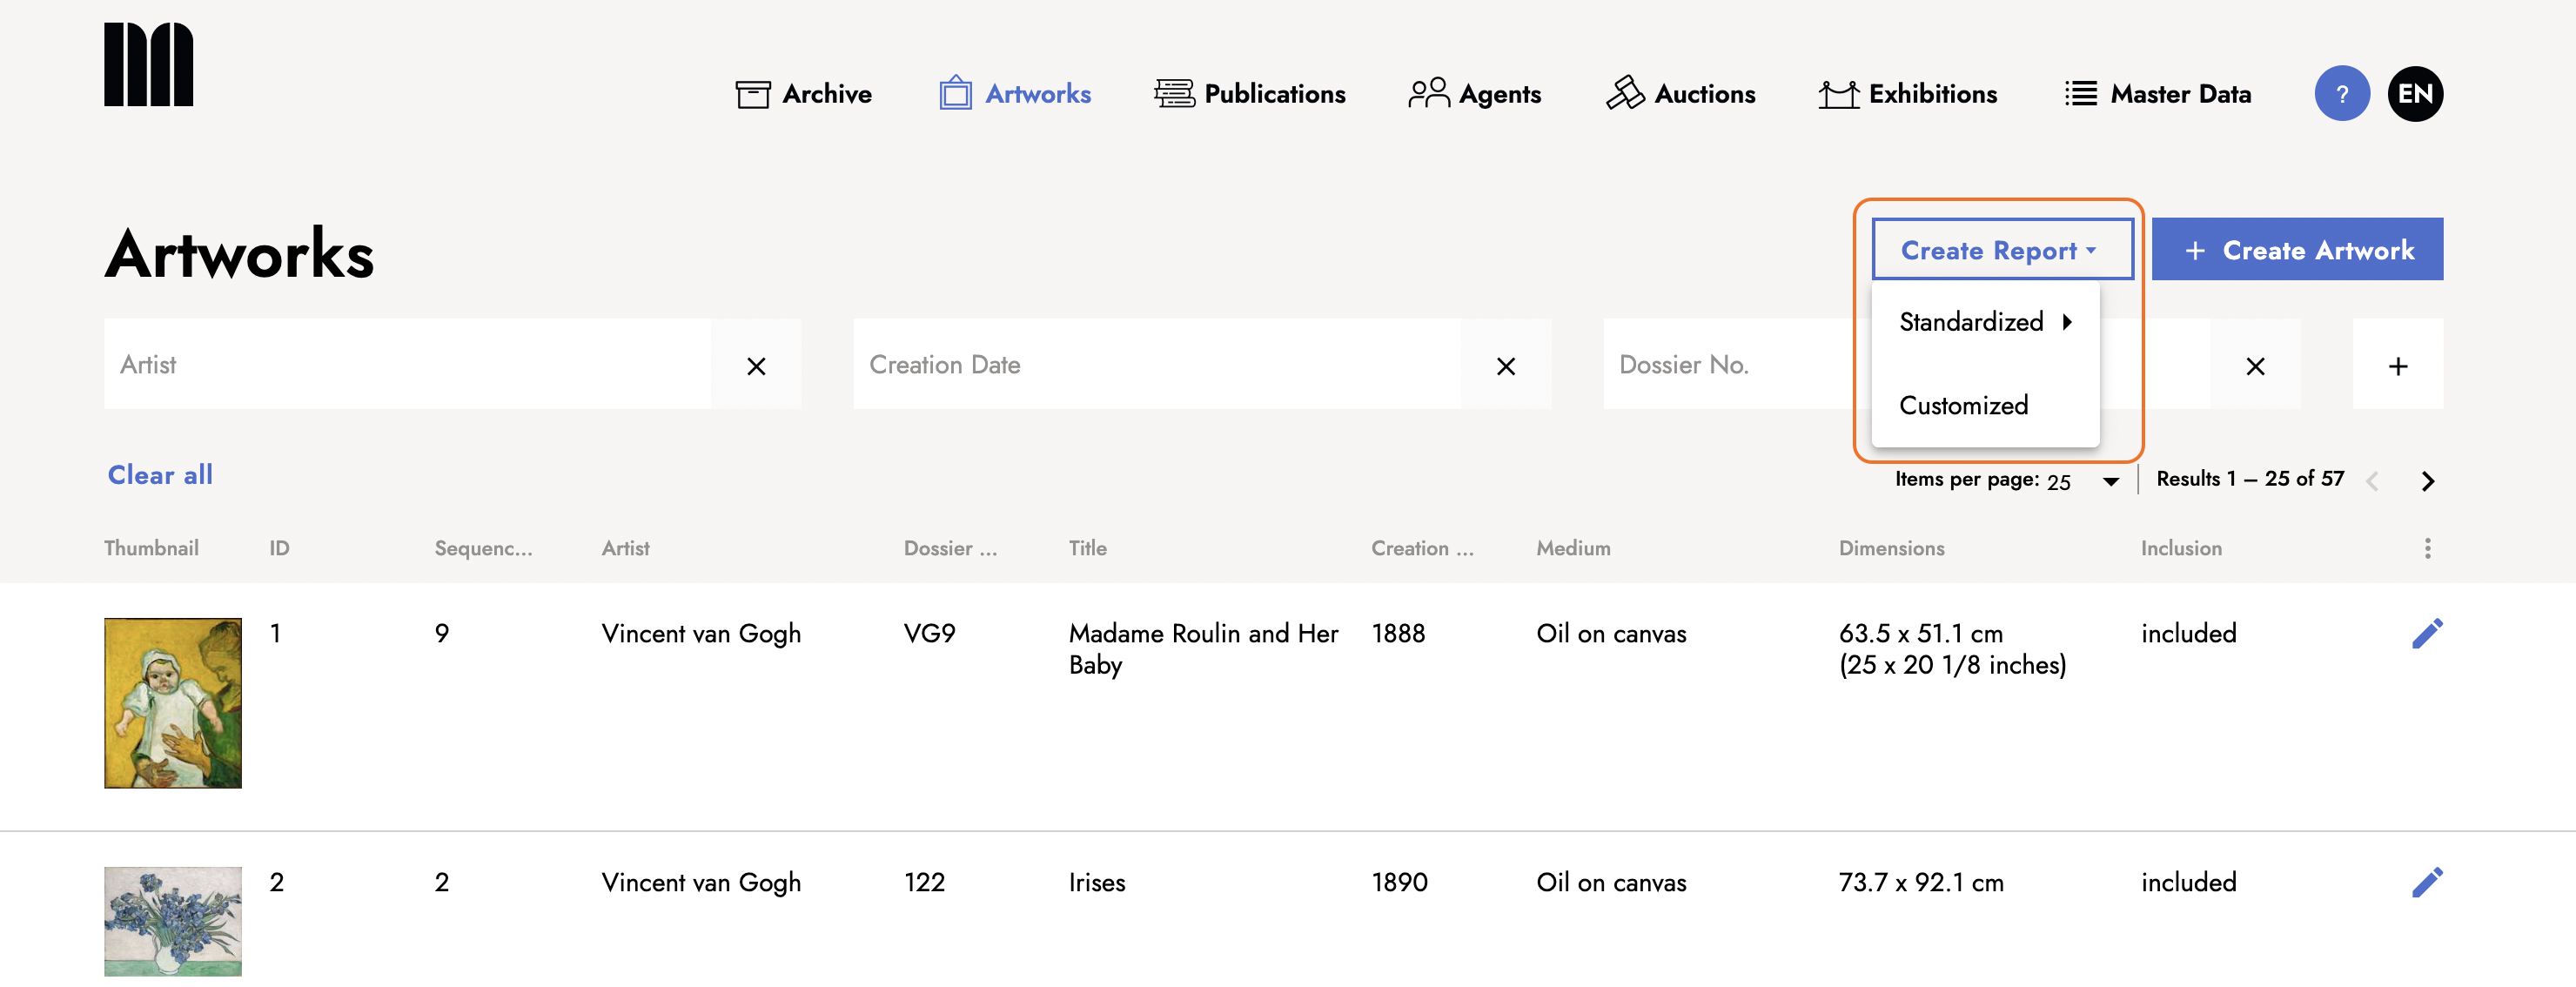
The standardized report offers the options of a full report or one of the published data.
The Customized button can be used to select the works for which a report is to be created.
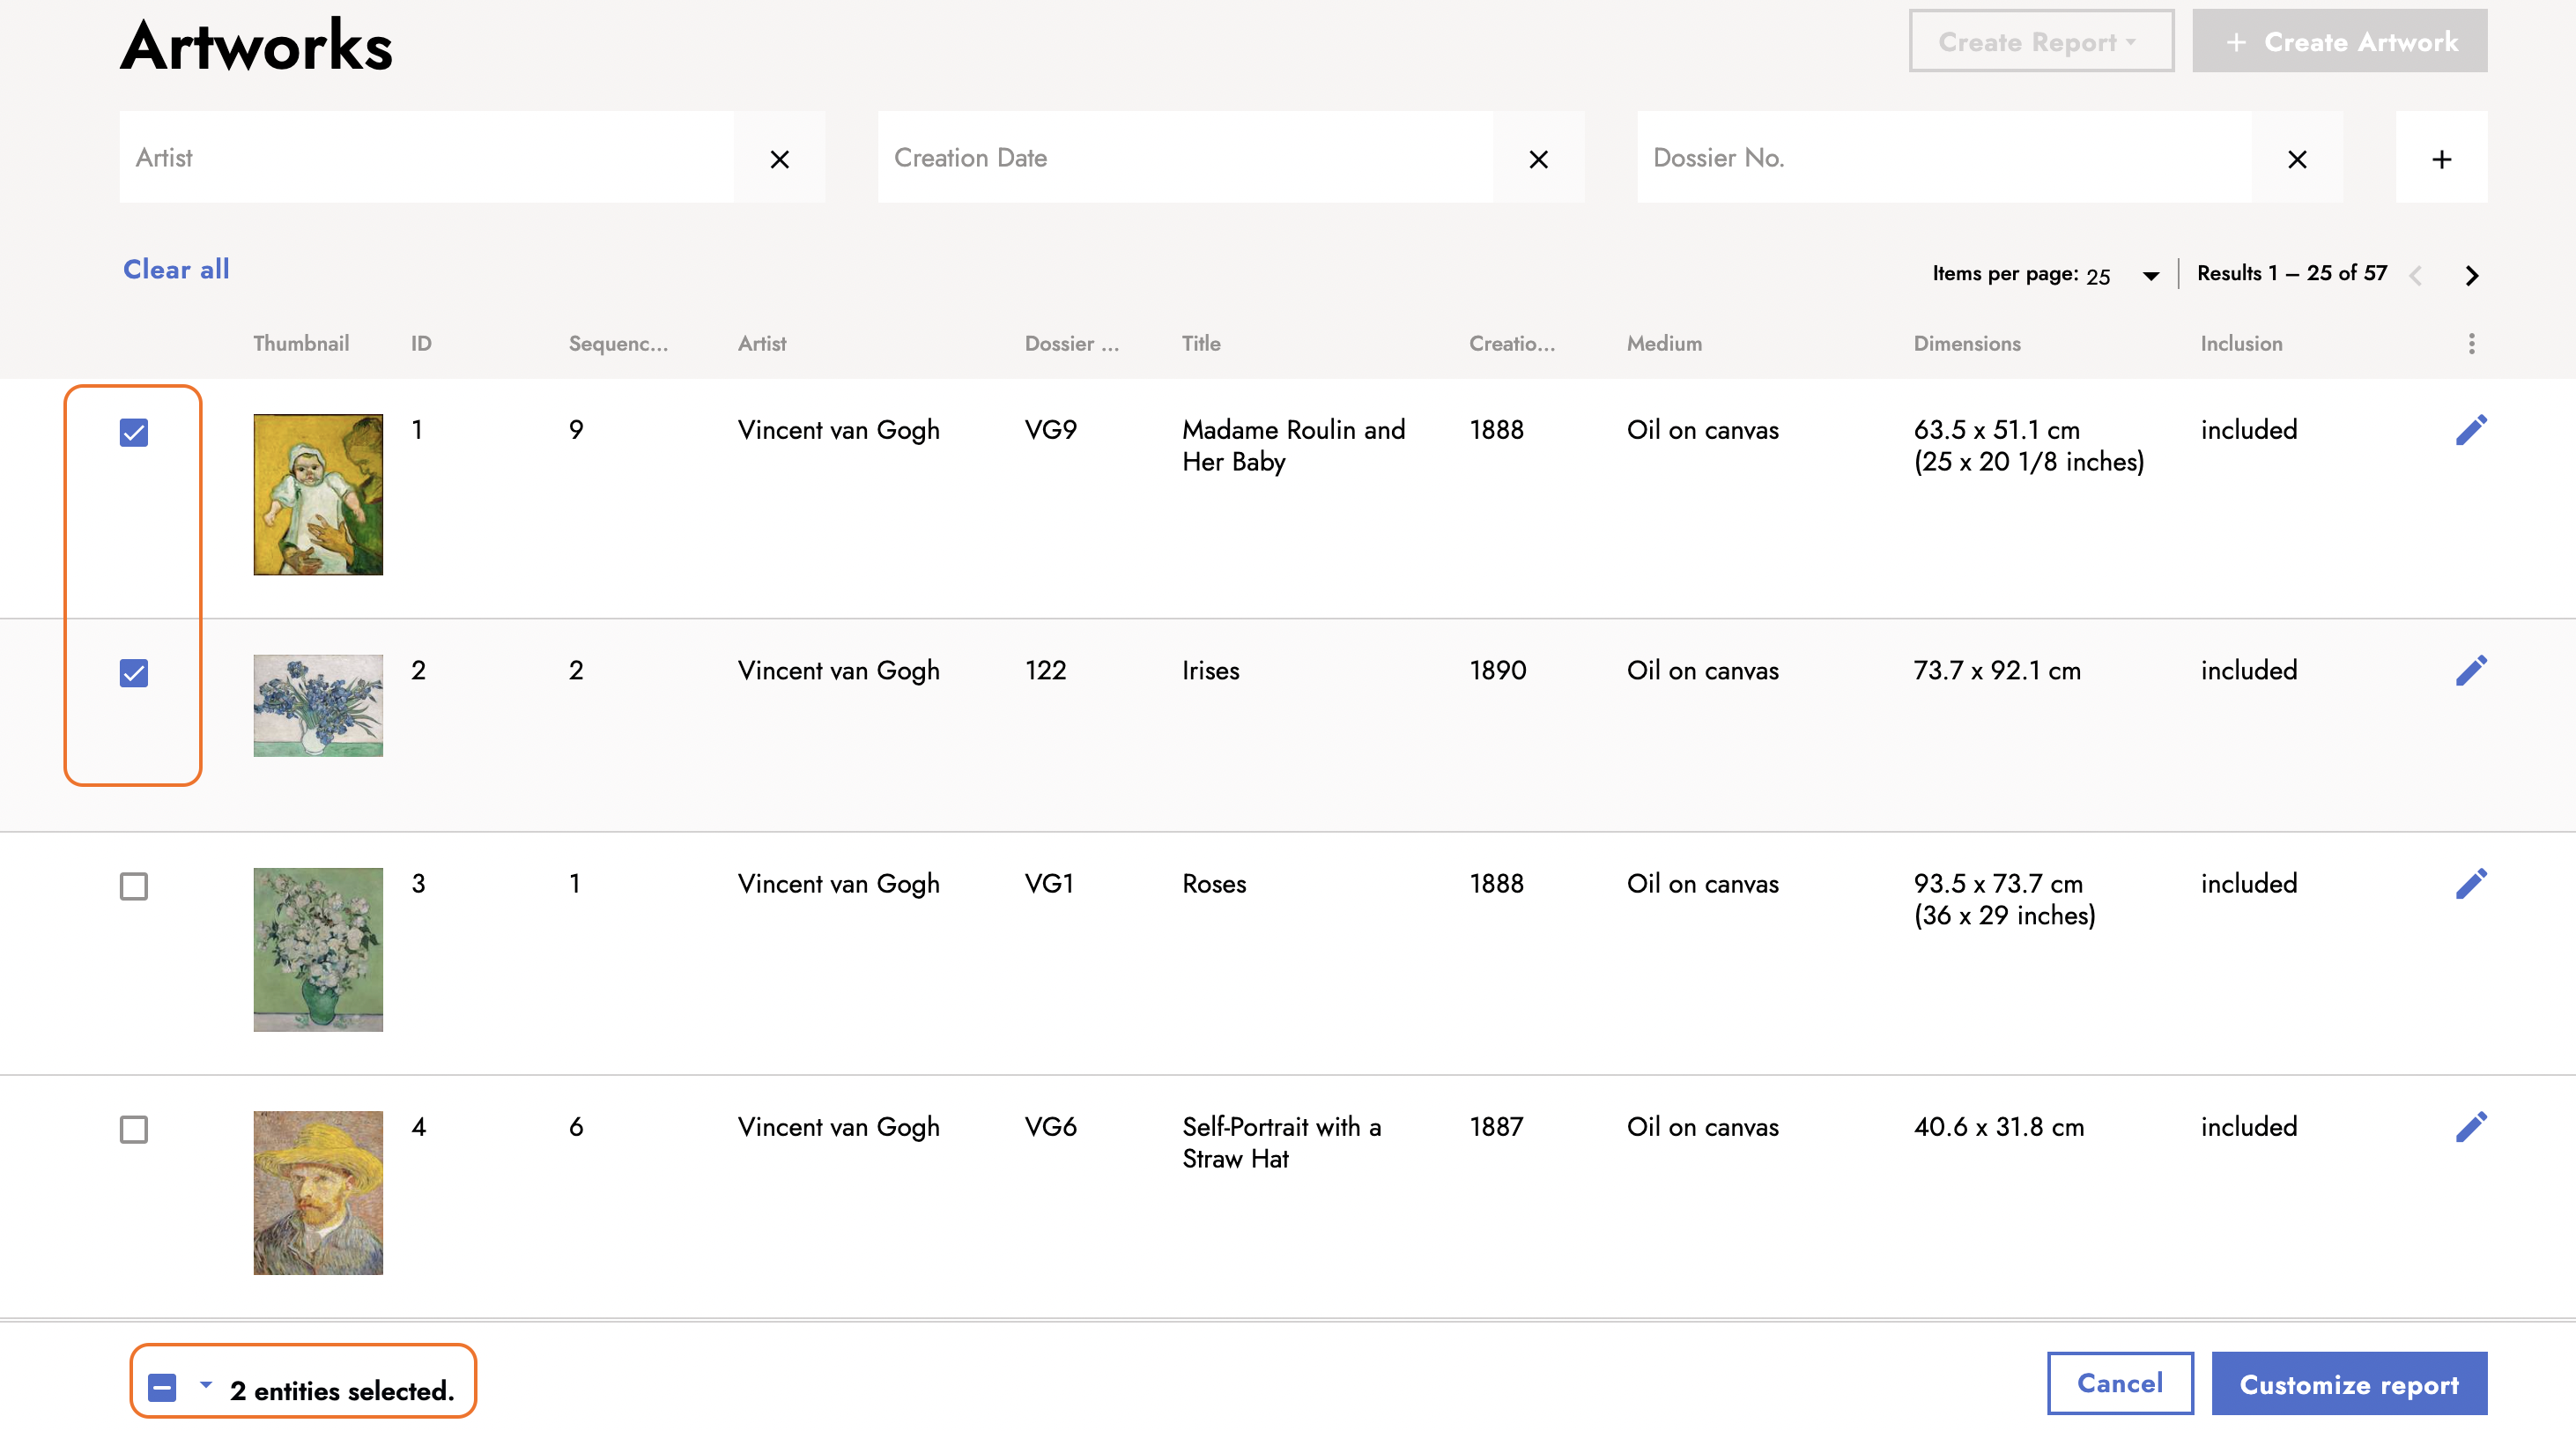
After selecting a number of artworks, the button customize report in the lower right corner opens a dialog window in which individual information for the report as well as the the export format can be selected.

For a more detailed look into the creation of reports, consult these tutorial:
1. How to generate and download artwork reports
2. How to generate standardized artwork reports in bulk
3. How to generate a customized report for multiple artworks
Contact Support
Via the question mark support button in the upper right corner of the main navigation a small dialog window opens. If required, problems can be described and communicated to us at any time. We will do our best to help you as quickly as possible.
What's next?
Now you know all the basics you need to get started with Navigating.art! To get to know the platform even better, the following tutorials will help you: