
One of the most important steps for building your catalogue raisonné is creating the artwork entries. This article explains how to create a new artwork by focusing on entering the main details, also called tombstone information.
- In the artwork section, click Create and select Artwork from the drop down menu.
- A new dialog will open. In the corresponding fields, type in the title, dossier no. and select the artist before saving your entry.


Once you created the artwork, you will be directed to the entry where you can enter further information. On the upper side, you will find the preview images and some information about the artwork, including the dossier number, the global ID, and the catalog number. In the field “Inclusion” you can select from a drop down menu whether or not your artwork is included in the public catalog. The default setting for the status is "pending." Pending means that no decision has been made yet.
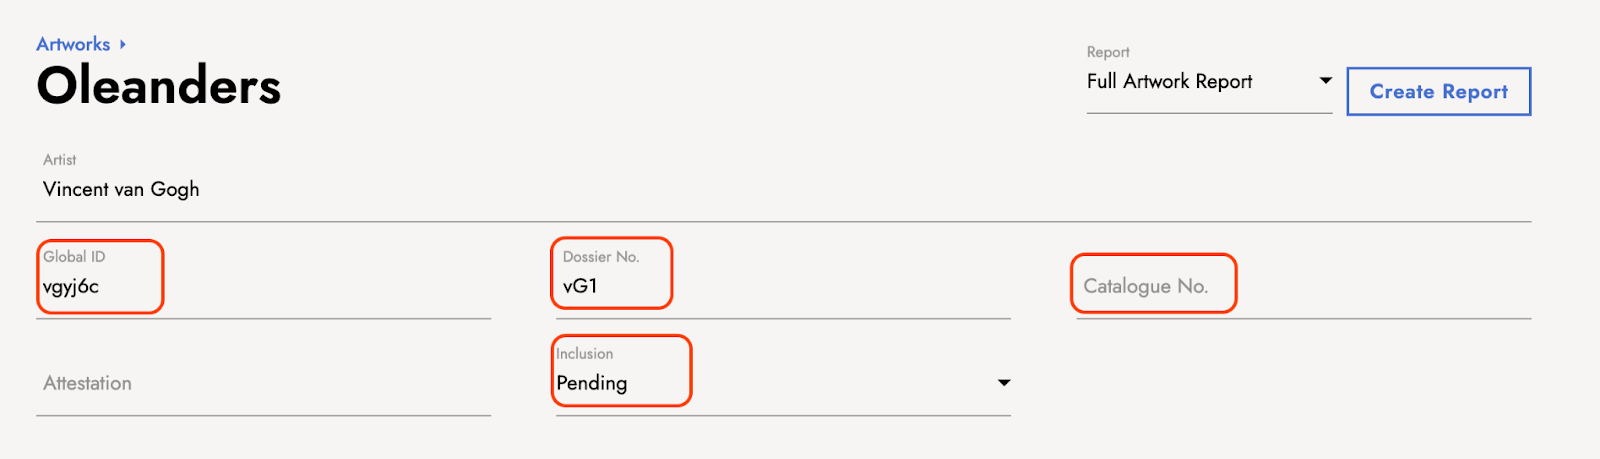
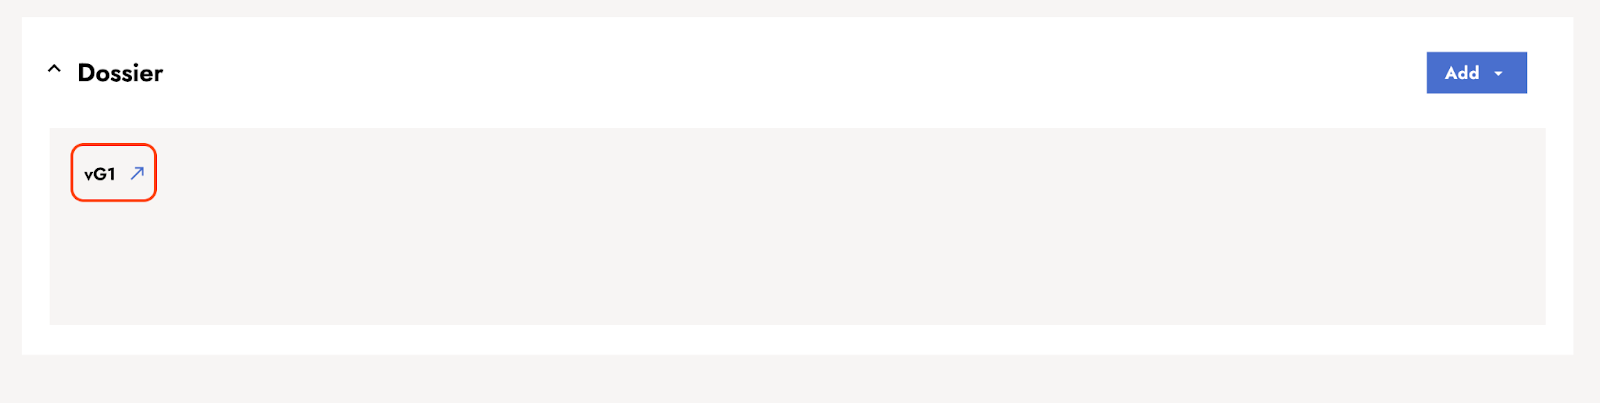
The dossier number must be assigned individually for each artwork. When a new artwork is created, an associated dossier with the specified number is automatically created. The corresponding dossier can be found in the lower area of the artwork entry and leads to the linked archive entry via a direct link.
Dossier with direct link to the archive:
The Global ID is generated automatically. The Catalogue number can be added later. For more detailed explanations about the artwork identifiers such as dossier no., global ID, catalogue number, etc., have a look at the article about the artwork identifiers and numbering systems.
To learn how to add a preview image, see the tutorials about how to add and change artwork preview images and how to upload artwork images.
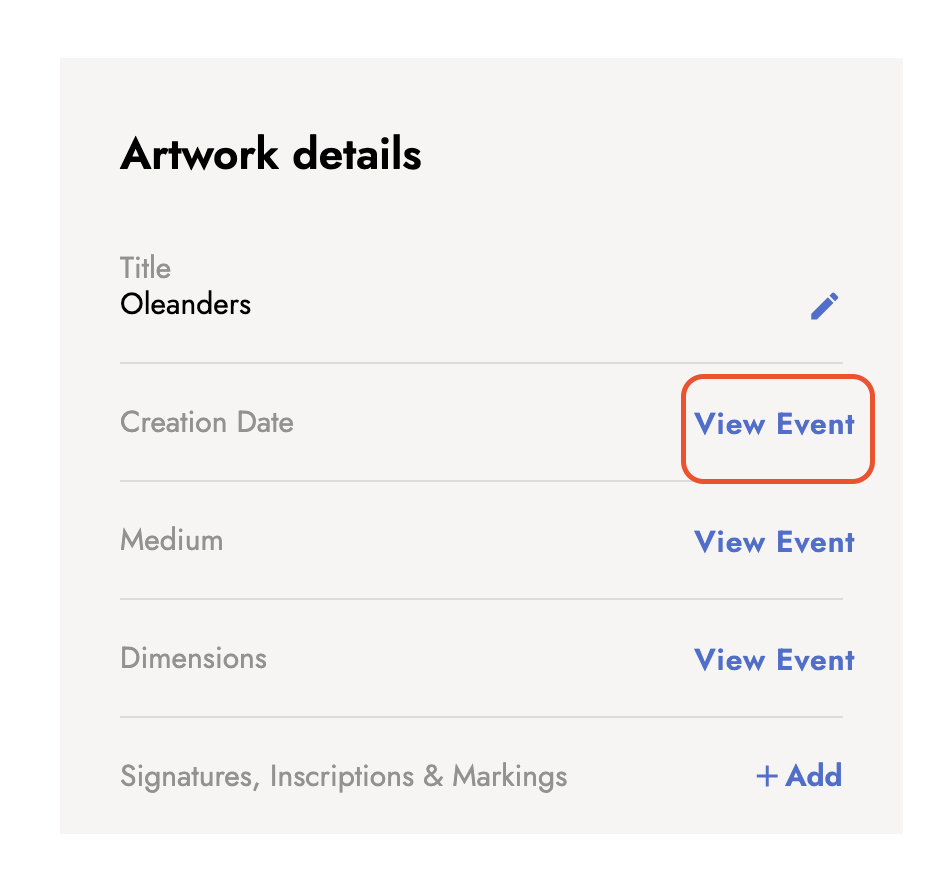
On the left side of the artwork entry, you will find the artwork details section. Click View Event to add information.
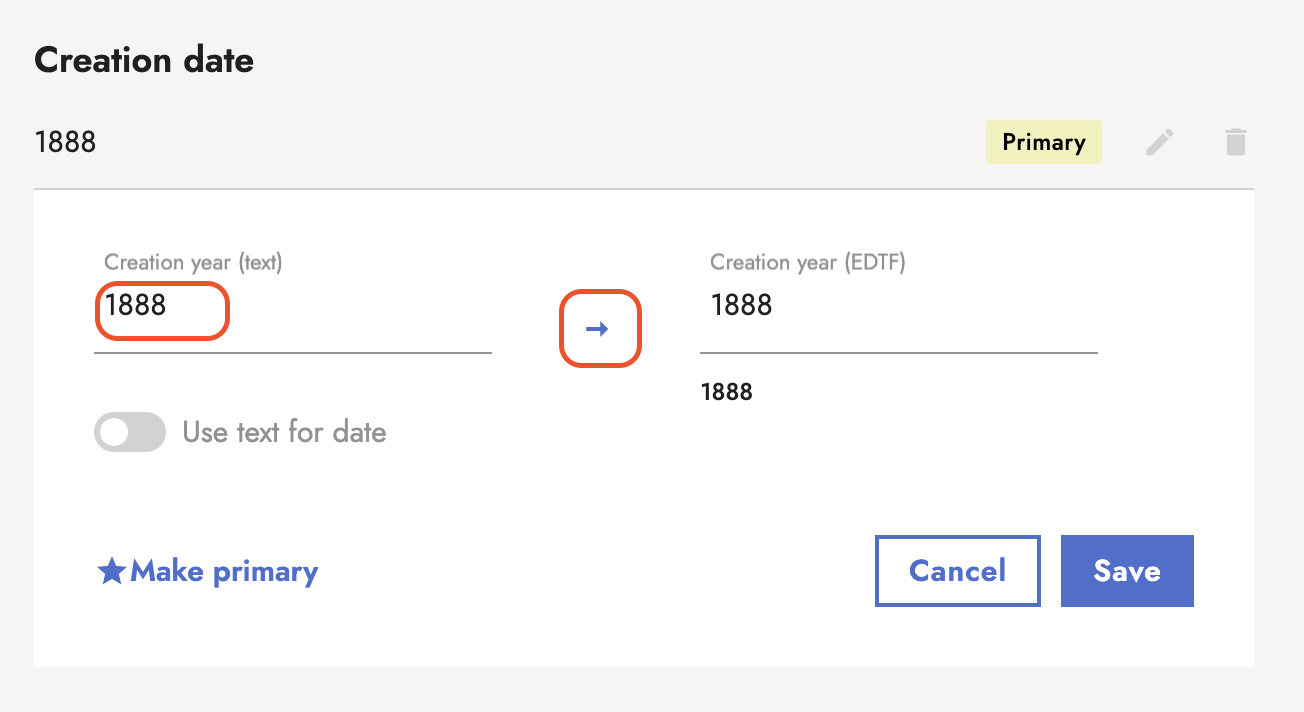
A dialog window will open. Click Add and select the information type you wish to add, e.g., a creation date.
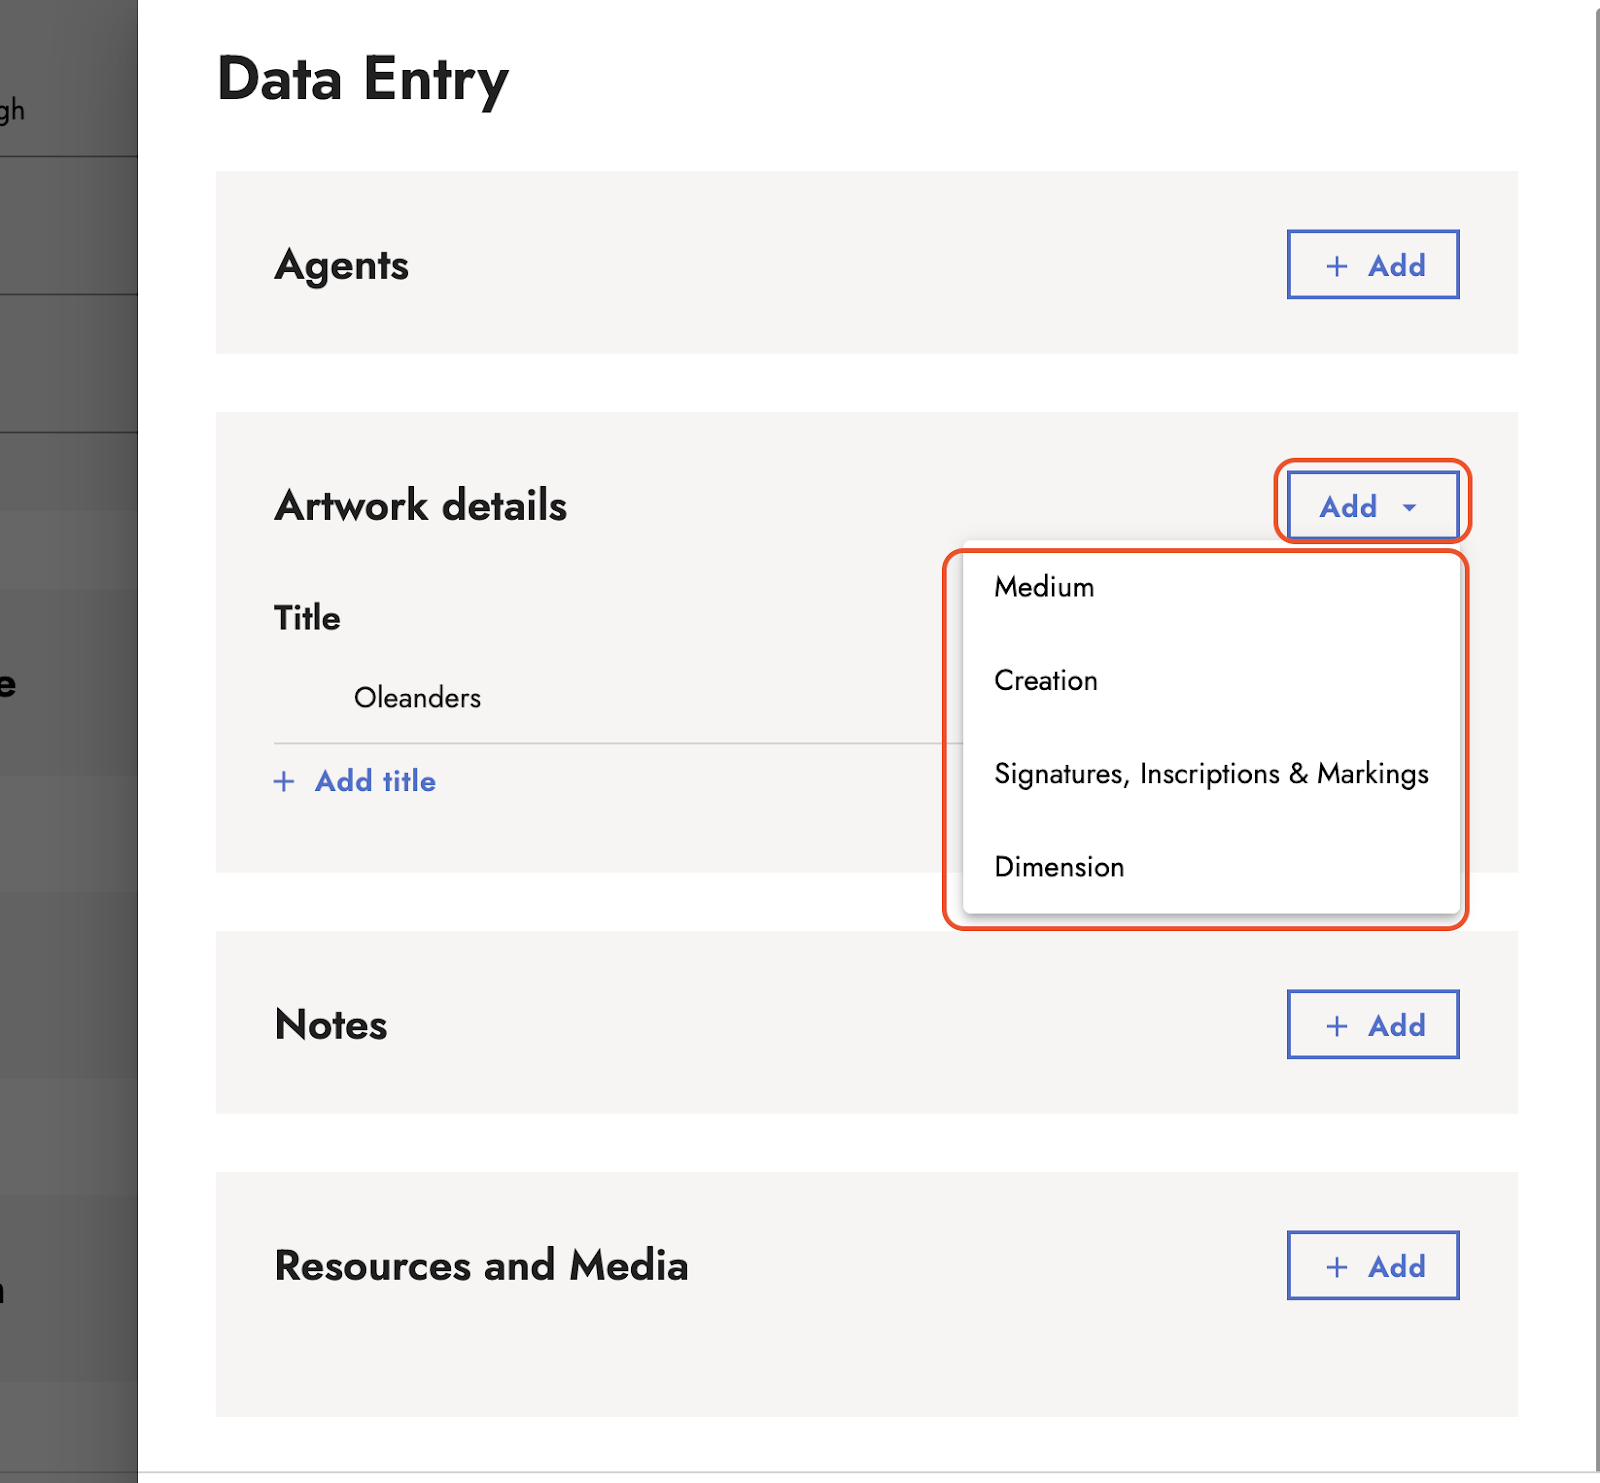
Type in the creation date in the corresponding field and click the arrow to activate the rendering. Click Save. You can enter more than one date, e.g., if you have different information about the date. In this case, you can mark one date as the primary date, which will then be displayed in the artwork details. The additional date information will only be displayed in the creation date event. If you only add one date, it will automatically be marked as primary. The same applies for dimensions and mediums.
Learn more about entering dates in this article.
You can add more information, e.g., medium, dimensions and signature, inscriptions, and markings by following the same steps as above.
Follow this article to learn more about how to add signatures, inscriptions, and markings.
Now that you know how to create an artwork, check out the tutorials about how to add a provenance, how to add an exhibition and how to add a publication.